Trying to figure out the best way to roof painting in 2025?
You’re not the only one.
Many homeowners will go online to answer questions like “can I paint a roof at home?”, “What’s the best roof paint to use?”, or, “Can I paint my roof myself? before they pay a pro or purchase materials.
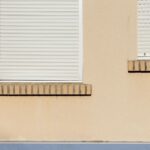
Roof painting is not just a matter of adding color; it helps keep the High Peaks of our High Country safe from the sun and rain, as well as mold and premature wear and tear under the harsh Australian sky.
However, before you pick up a brush or spray gun, many wonder: How do I go about roof painting?
That depends on your roof’s condition, the material, the weather and the paint you select.
In this post, we’re going to set out exactly how to paint a roof step by step, from finding out if it needs to be painted and the right roof paint for you, to how to apply it and keep safe doing so.
Why Roof Painting Matters
Roof painting is not only painting to make your roof look clean or to make it look nice and colourful, but it serves a greater purpose towards the well-being of your home. No matter if your roof is made of tile or metal, using the proper roof paint can make it last longer and prevent you from paying for expensive repairs in the future.
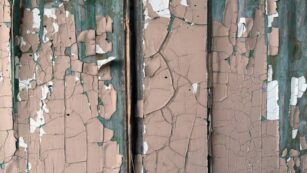
Australian roofs are often exposed to heavy sunlight, rain, dust, and even moss or algae.
Over time, these wear away the surface and create dents, cracking, rust, or colour fade. A quality coat of roof coating paint serves as an effective barrier. It’ll prevent damaging UV rays, keep water from intruding, and it can even help reduce heat within your home.
If you’re working with a professional like a roof tiler perth, they may also suggest heat-reflective paints to cut cooling bills, especially in warmer regions.
Home users using good products can also help in minimizing the cooling costs of their homes. Some paints deflect heat, so homes, especially those in full sun, stay cooler in summer.
Roof painters also prevent the growth of moulds and algae, especially if it rains a lot in your locality. If metal or tile sheets are not adequately sealed, they trap moisture and cause damage.
Besides the beautiful finish, it is also easier to install and close up small surfaces with a surface gap between boards.
Other than shielding, roof painting makes your home beautiful. A new painted roof means added resale value for your property, if and when you decide to rent or sell.
That’s why painting your roof, with the right roof tile paint, or roof paint specifically from Bunnings, as a basic maintenance task, can be such a smart move for homeowners.
Step-by-Step: How to Do Roof Painting
Following the correct steps for roof painting indicates a proper way to do it, from preparing the surface to making sure that the paint is applied safely and evenly.
If you miss a step, the result will be paint that peels, fades too soon, or won’t protect your roof.
Here are most professionals’ steps, which you can also take if you want to do this yourself.
Roof Inspection
Start by checking both the inside and outside of your roof. From the inside, look at the attic for any brown stains, moisture patches, mould, or musty smells — these may be signs of a hidden leak.
On the outside, examine the tiles or sheets for cracks, rust spots, loose screws, or any damage near vents or flashing.
Before painting, you must fix all these issues. Any rust, broken parts, or pest damage should be repaired first.
Painting over these problems will only hide them for a short time, and the damage will return.
Roof Cleaning and Sterilising
Once repairs are done, the next step is to clean the surface thoroughly. Remove all dust, dry leaves, moss, and mould. A clean roof is important because paint won’t stick properly to dirty or greasy surfaces.
Depending on your roof’s condition, cleaning can be done with pressure washing, a brush and water, or with a mild sterilising wash.
This step also helps remove bacteria and spores that cause future mould growth. Make sure the roof is fully dry before continuing.
Sealant Application
After cleaning, apply a roof sealant to prepare the surface for paint and give added protection. A good sealant protects your roof from sun damage, water leaks, and even small fires. It also helps in insulation by reducing heat transfer.
Common types of sealants include rubber-based (elastomeric), silicone-based, and others. The right one depends on your roof material and local weather. This layer also helps the paint hold better and last longer.
Choose the Right Roof Coating
Now, select the coating that is suitable for you. Acrylic finishes are reinforced and suitable for most climates, although you may have fewer colour options.
Silicone coatings provide excellent UV resistance and a high degree of flexibility, making them appropriate for roofs that experience severe weather.
Asphaltic material is noted for durability and strong waterproofing properties, and is usually dark in colour.
Tough polyurethane coatings are also good for roofs that might be trafficked by feet or subjected to abrasion.
What kind of coating to use? The kind of coating you will use will depend on exactly what type of roof you have and how hard on it you’re going to be.
If you’re unsure, professional services like roof painters perth can recommend coatings that match your needs.
Select the Painting Method
Before any paint goes on, figure out how you’ll do it. A brush is more control, better for small or detailed areas, but more of an investment of time and effort. Rollers work faster and are great for larger areas, although they can be messy if not applied with care.
Spray machines can be the fastest and are best for big, commercial roofs, but they take a steady hand and prep work to avoid overspraying. Use a method appropriate for the size and type of your roof.
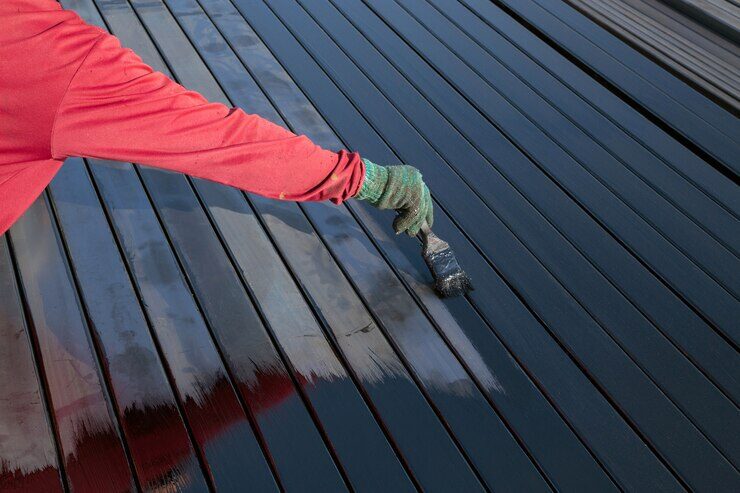
Roof Paint Application
Now it’s time for the paint. You’ll want to make sure the option of paint option you choose can be used with the material on your roof.
Water-based paints are also popular because they go on smoothly and dry quickly.
Oil-based paints are better on iron or metal roofs as they provide better coverage and protection from rust.
If you want something extra, you might prefer paints with thermal and weather-resistant properties to minimize heat and enhance longevity.
Never lay on fewer than two coats for good drying time between layers, and you can get the 2nd coat on before the 1st has time to get dirty.
Safety Tips for Roof Painting
Before you begin painting the roof, it is very important that you take essential safety measures. A roof can be a dangerous place to work, especially if it is wet, at an angle, or slippery.
- Wear shoes that won’t be slippery.
- You’ll need a sturdy ladder and a helper to hold it for you.
- Don’t attempt to paint from double-storey or steep roofs; phone a professional.
- Avoid painting in the extreme sunshine, wind, or rain.
- Keep all tools close by so that you don’t have to do too much walking on the roof.
- If you’re ramping up your cleaning routine before flu season, wear gloves and a mask if cleaning solutions make you feel woozy.
- Don’t walk on still-drying paint, it’s slippery and can be hazardous.
- You must always paint from top to bottom, and as the paint is slow to dry, it must be applied only a little at a time.
- If you feel lost or confused, ask a friend.
- Whilst painting a roof, safety should be of utmost priority.
To Sum Up
This article you are about to read covers everything about how to do roof painting. Roof painting the exterior of your home can be an overwhelming DIY home improvement project if you’re not prepared for what goes into it.
So in case you were looking for stuff such as roof painting, how to paint a roof, or roof coating paint, you’re doubts should be over now. You have a single, all-inclusive step-by-step in one place. Just go through the process and you’ll be fine.